In this article
Your child wants warm, comforting food when winter hits, but most Australian schools don't have microwaves for students. A quality thermos food jar keeps meals hot for 6+ hours, giving you endless possibilities for satisfying winter lunches. I've been packing thermos lunches through 5 Melbourne winters — here's what actually works.
Why winter thermos lunches work for Aussie families
Kids naturally crave warm, hearty food during cold months. While a sandwich might satisfy them in summer, winter calls for something more substantial. Most Australian schools don't provide microwaves for student use, making thermos containers your best option for delivering hot meals.
Thermos lunches also solve the leftover problem. That extra serving of last night's pasta bake or soup transforms into tomorrow's lunch with minimal effort. You're using seasonal ingredients when they're cheapest and most flavourful — think winter vegetables, hearty grains and warming spices.
The key is understanding that thermos lunches aren't just about keeping food warm. They're about providing comfort food that travels well and maintains both temperature and texture for 4-6 hours. Australian winter weather can be unpredictable — from Melbourne's four seasons in one day to Brisbane's sudden cold snaps. A thermos gives your child consistent warmth regardless of what the weather throws at them.
Winter also brings increased energy needs. Kids burn more calories staying warm during outdoor play, making nutrient-dense hot meals more important than ever. A properly packed thermos delivers both the calories and comfort they need to power through cold afternoons.
90%
of Australian school children bring home-packed lunches
Oxford Academic 2024
Making thermos skills essential for most parents
The 5-minute thermos prep method that actually works
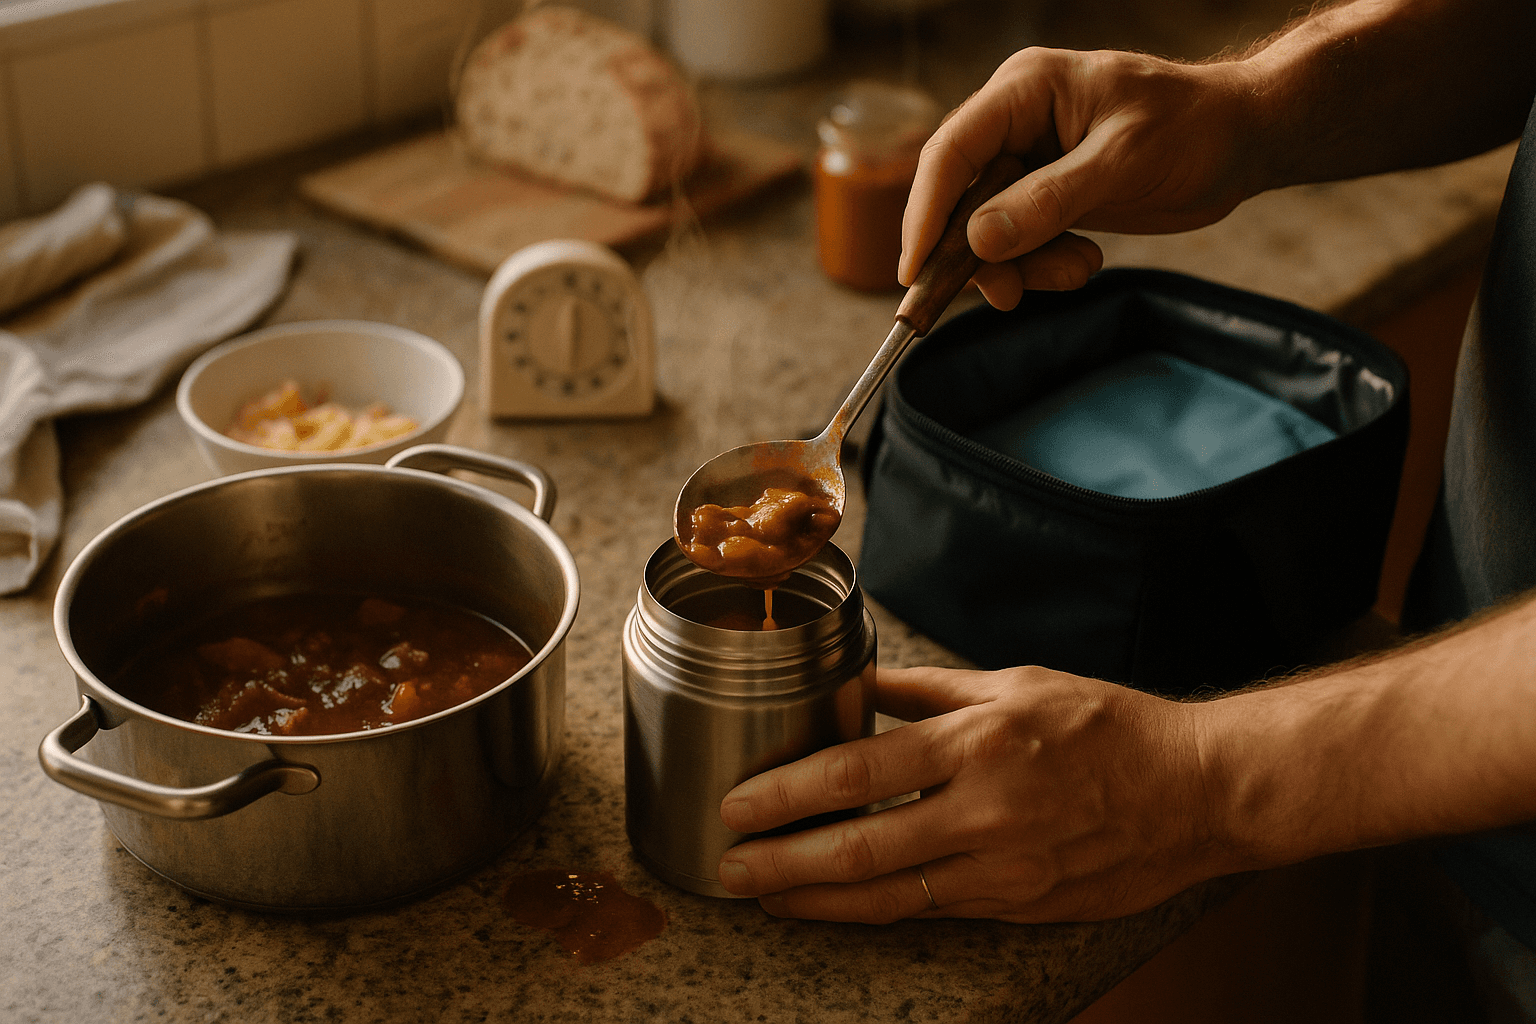
Proper preheating makes the difference between lukewarm disappointment and steaming success. Fill your thermos with boiling water, screw on the lid, and let it sit while you heat the food. This step isn't optional — it can add 2-3 hours to your food's hot life.
Here's my morning routine:
- Fill thermos with boiling water (2 minutes)
- Heat yesterday's leftovers or prepare fresh food (3-4 minutes)
- Empty thermos, immediately add hot food, seal tight
- Test temperature at pickup time — food should still be 60°C+
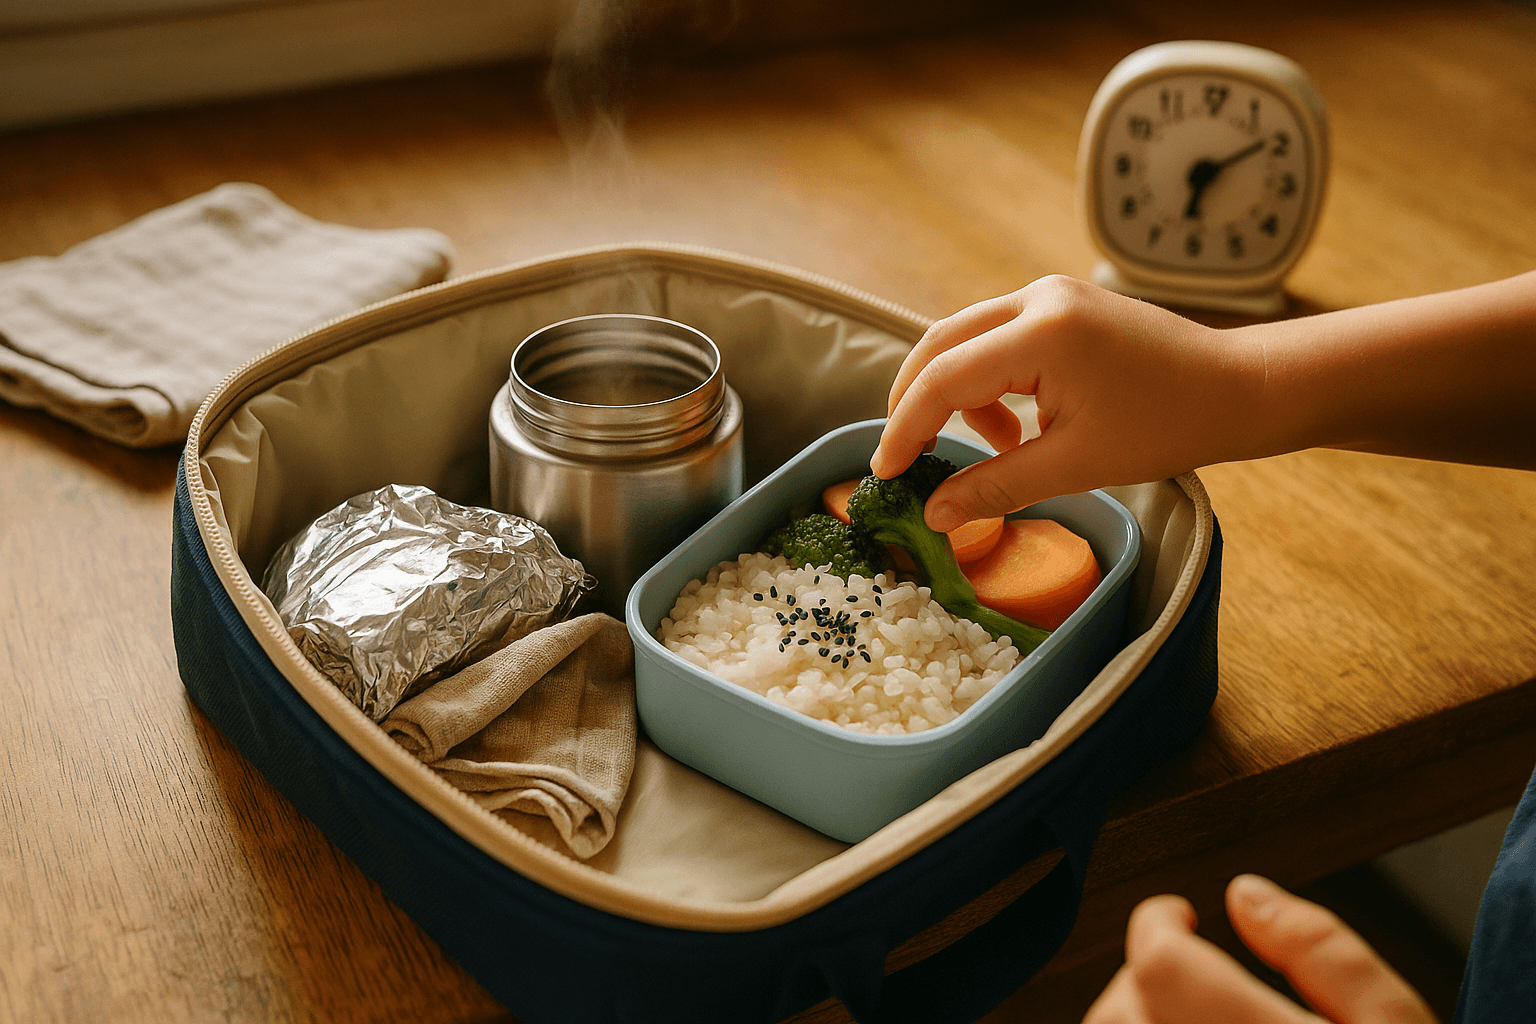
For portion sizes, the Thermos FUNtainer Food Jar 290ml works perfectly for ages 4-8, while older kids need the 470ml version. Don't overfill — leave 1cm space at the top for proper sealing.
The biggest mistake parents make is rushing the preheat step. Those two minutes feel like forever when you're running late, but they're non-negotiable. Set your alarm 5 minutes earlier rather than skipping this step.
Temperature matters more than you think. Food needs to be 75°C+ when packed to still be 60°C+ at lunchtime. Use a cooking thermometer if you're unsure — most parents underestimate how hot food needs to be initially.
Perfect thermos prep technique
Preheat with boiling water
Fill completely, seal, let sit 2-3 minutes while heating food
Heat food to 75°C+
Slightly hotter than serving temperature — it will cool to perfect eating temp
Empty and fill immediately
No delays — transfer hot food straight into the preheated thermos
Seal and don't open
Each opening releases heat — trust the process until lunchtime
The timing matters. Food heated to 75°C and properly packed will still be 60°C+ after 6 hours. Any cooler at the start, and you're risking food safety issues by lunchtime.
12 winter thermos lunches kids will demolish
These aren't fancy restaurant meals — they're practical, kid-friendly options that travel well and taste great hours later.
Soup-based meals:
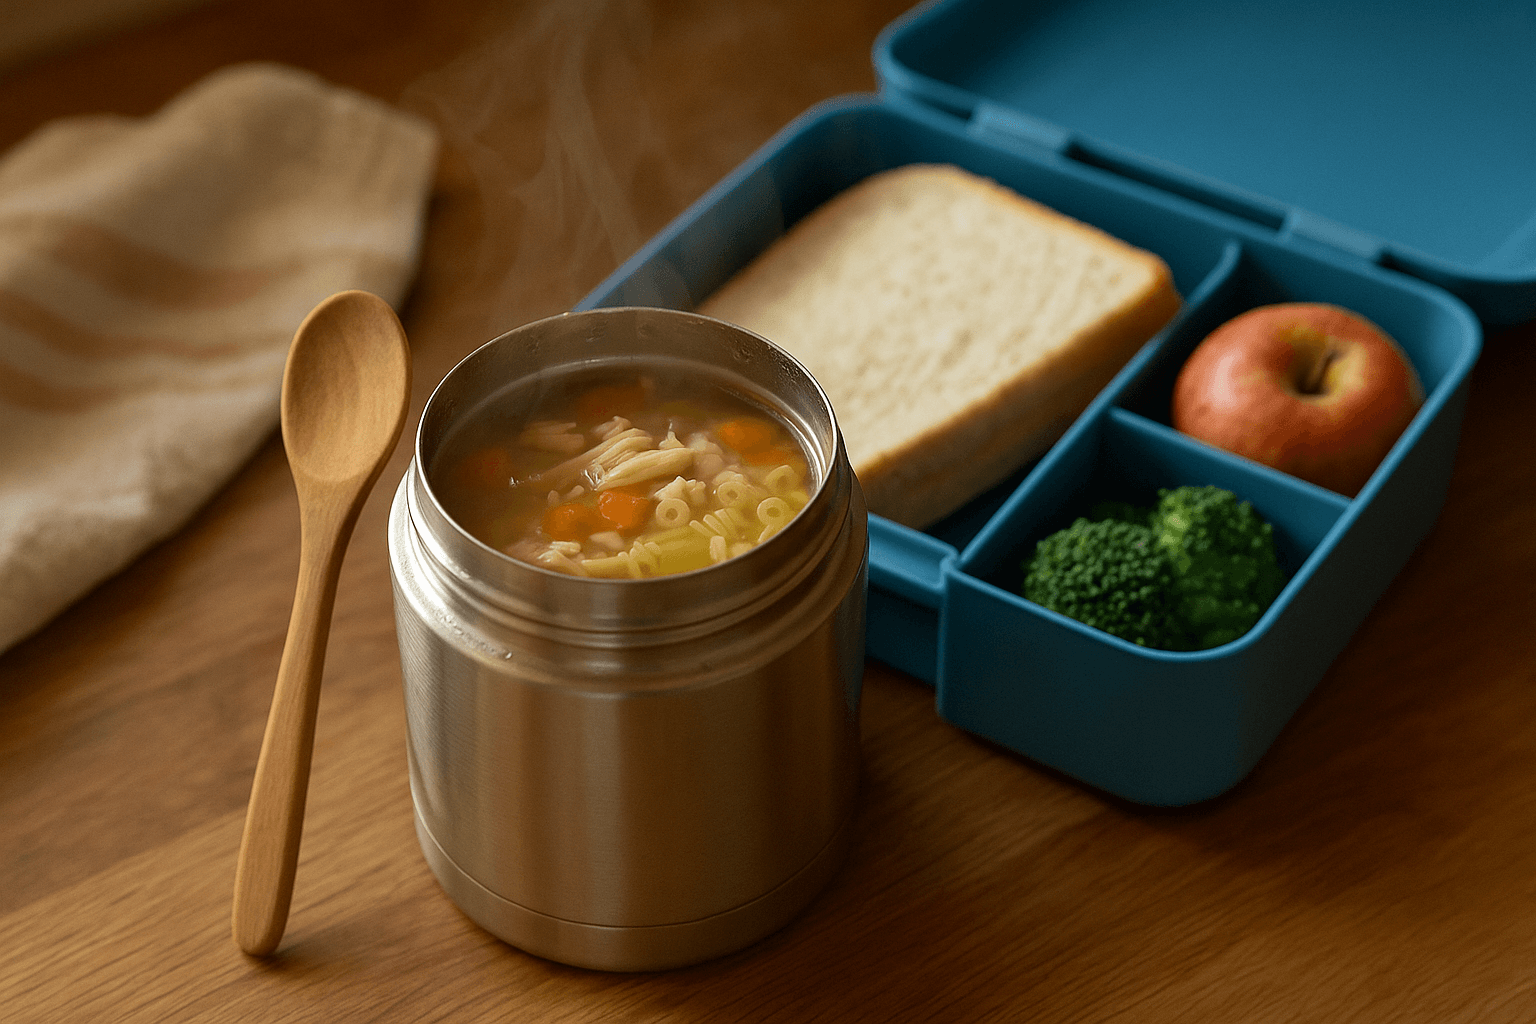
- Chicken and vegetable soup with small pasta shapes
- Tomato soup with mini cheese toasties for dipping
- Pumpkin soup (smooth texture works best)
- Beef and barley soup (hearty and filling)
Leftover transformations:
- Spaghetti bolognese (add extra sauce to prevent drying)
- Fried rice with scrambled egg and vegetables
- Butter chicken with rice mixed through
- Mac and cheese with steamed broccoli pieces
Comfort food classics:
- Mini meatballs in tomato sauce
- Chicken and corn kernels in white sauce
- Baked beans with diced ham
- Scrambled eggs with cheese and herbs
The secret is adding slightly more liquid than you'd normally serve. Food continues cooking in the thermos and can dry out. Extra sauce, broth or melted butter keeps everything moist and appealing.
Texture is crucial for thermos success. Avoid anything that goes mushy when reheated — think overcooked vegetables or delicate fish. Stick to robust ingredients that improve with gentle reheating. Root vegetables, hearty grains, and well-seasoned proteins work best.
Consider your child's eating habits too. If they're slow eaters, pack foods that taste good even when they've cooled slightly. If they eat quickly, you can include items that are best enjoyed hot.
Leftover magic
Yesterday's roast dinner becomes today's thermos lunch. Shred the meat, add gravy, mix in soft vegetables. Your kids get comfort food, you get convenience.
You can transform dinner leftovers into thermos lunches with minimal morning prep. The key is thinking about texture — chunky stews work better than delicate fish dishes.
Choosing the right thermos for Australian conditions
Not all thermos containers are created equal. Australian winters range from Darwin's mild dry season to Tasmania's bitter cold, and your thermos needs to perform regardless of location.
Stainless steel beats plastic every time for heat retention. Look for double-wall vacuum insulation and a wide mouth for easy filling and eating. The Thermos FUNtainer series consistently outperforms cheaper alternatives in Australian testing conditions.
Size matters more than you think. A 290ml thermos works for younger children but leaves older kids hungry. The 470ml size satisfies most primary school appetites without being too heavy in their bag.
Check the seal quality before buying. The rubber gasket should feel firm and create slight resistance when closing. A loose seal means lost heat and potential leaks in school bags.
Consider the opening mechanism too. Twist-off lids retain heat better than flip-tops, but younger children might struggle with tight seals. Test with your child before committing to daily use.
Brand reputation matters for thermos containers. Cheap alternatives might work initially but lose effectiveness within months. A quality thermos lasts years with proper care, making it a worthwhile investment for regular use.
Troubleshooting: when your thermos isn't keeping food hot
Temperature loss usually comes down to three issues: inadequate preheating, not enough starting heat, or a damaged seal. If your thermos can't keep boiling water hot for 6 hours when empty, it's time for a replacement.
Condensation inside the thermos is normal, but excessive moisture suggests your seal isn't tight. Check the rubber gasket for cracks or food residue. A proper clean with warm soapy water usually fixes minor sealing issues.
Test your thermos quarterly: fill with boiling water, seal, wait 6 hours. The water should still be uncomfortably hot to touch. If it's merely warm, your thermos has lost its effectiveness.
Environmental factors affect performance too. Extremely cold weather can accelerate heat loss, while direct sunlight can help maintain temperature. Store the thermos in your child's bag rather than exposed to weather.
Hard water can affect thermos performance over time. Mineral buildup on the inner walls reduces insulation effectiveness. Clean monthly with white vinegar to remove deposits and maintain peak performance.
Thermos troubleshooting checklist
Common mistakes include filling with lukewarm food, skipping the preheat step, or opening the thermos to check temperature. Each opening releases heat — trust the process.
If food textures are going soggy, you might need to adjust your recipes. Dense foods like pasta need less liquid, while rice-based meals need more. It takes a few attempts to get the balance right for your family's preferences. Check out our guide on how to prevent soggy textures for more detailed solutions.
Related: Budget Lunchbox Shopping: Aldi vs Coles vs Woolies
Safety first: keeping hot food safe for hours
Hot food safety follows the danger zone rule: food between 4°C and 60°C allows bacterial growth. Your thermos lunch needs to stay above 60°C to remain safe without refrigeration.
The 4-hour food safety rule applies here — food can spend up to 4 hours in the danger zone before becoming unsafe. A properly packed thermos keeps food well above this zone for 6+ hours.
Morning preparation is safer than night-before packing. Even the best thermos will lose some heat over 12+ hours. If you must prep the night before, use the refrigerator and reheat thoroughly in the morning.
Signs your food has been compromised: off smell when opening, unusual texture changes, or lukewarm temperature after 4 hours. When in doubt, throw it out.
Australian health departments recommend treating thermos lunches like any other hot food service. The same safety standards apply whether you're running a restaurant or packing your child's lunch.
Teach your child to recognise unsafe food too. If their lunch smells wrong or tastes odd, they should stop eating immediately. Better to go hungry for a few hours than risk food poisoning.
Food must be 75°C+ when packed to remain above 60°C after 6 hours. This isn't negotiable — it's food safety.
Cost-effective winter ingredients that work in thermos
Winter vegetables like pumpkin, sweet potato, carrots and onions are cheapest during cold months and perfect for thermos meals. They hold their texture well and absorb flavours beautifully.
Batch cooking on Sunday saves both time and money. Make a large pot of soup, portion into daily serves, and reheat each morning. Compare this to buying hot food from the school canteen — you're saving $3-4 per day while providing better nutrition.
Budget-friendly thermos staples:
- Dried legumes (lentils, chickpeas, split peas) for protein and fibre
- Seasonal root vegetables for vitamins and natural sweetness
- Rolled oats for hearty breakfast thermos options
- Tinned tomatoes for sauce bases year-round
- Frozen mixed vegetables for quick additions to any meal
Shop the specials and adapt your thermos menu accordingly. When mince is on special, make a big batch of bolognese. When pumpkins are cheap, roast several and use throughout the week in different combinations.
Herbs and spices transform basic ingredients into exciting meals. A well-stocked spice rack means your thermos lunches never get boring, even when using the same base ingredients repeatedly.
Thermos lunch costs vs alternatives
Homemade thermos lunch
$1.80
- ·Hot, nutritious meal
- ·Uses leftovers
- ·Customisable portions
Lowest cost
Complete nutrition control
Reduces food waste
Requires morning prep
Equipment investment
Best value for regular use
School canteen hot food
$4.50
- ·Convenient
- ·No prep required
- ·Social aspect
Zero prep time
Kids choose variety
Expensive
Limited nutrition control
Not always available
Occasional treat only
Cold sandwich lunch
$2.20
- ·Quick preparation
- ·Reliable option
- ·No equipment needed
Fast morning prep
Kids familiar with format
Not warming in winter
Limited variety
Can get boring
Good backup option
Seasonal shopping makes thermos lunches even more affordable. Root vegetables, winter squash and hearty grains form the base of countless warming meals. Stock up when prices drop and batch cook for the week ahead.
The average family spends significantly more on average daily lunch costs when relying on convenience options. Thermos lunches using seasonal ingredients can cut these costs by 60% while improving nutrition.
Winter is also perfect for using extreme weather lunchbox strategies that focus on warming, energy-dense foods that fuel kids through cold playground sessions.
Making thermos lunches part of your routine
Success with thermos lunches comes from building sustainable habits rather than perfect execution every day. Start with two thermos days per week and gradually increase as the routine becomes automatic.
Sunday meal prep makes weekday mornings manageable. Cook one large batch of soup, stew, or sauce that can become multiple thermos lunches with different additions. Portion into containers and refrigerate until needed.
Keep backup options ready for chaotic mornings. Tinned baked beans, instant noodles with added vegetables, or scrambled eggs with cheese can all become acceptable thermos lunches in under 5 minutes.
Involve your children in planning thermos menus. They're more likely to eat food they've helped choose. Let them pick between two options or suggest modifications to family favourites.
Track what works and what doesn't. Keep a simple note in your phone about which lunches came home empty and which came home full. This feedback helps you refine your thermos repertoire over time.
Get Your Winter Lunch Calendar
Month-by-month thermos ideas using seasonal ingredients
Remember, the initial thermos investment pays for itself within 2-3 weeks of regular use. After that, every hot lunch is money in your pocket and nutrition in your child's body.
How useful was this?
Get Your Winter Lunch Calendar
Month-by-month thermos ideas using what's in season
Written by Pat
Dad of two, Melbourne. Half Chinese, raised on incredible food. I make quick school lunches and test every piece of gear before recommending it. No bento art — just real food made with love.