In this article
Let me tell you something that changed our morning routine completely: teaching my kids to build their own lunches. Not just picking between two pre-made options, but actually assembling their meals from scratch.
Related: Winter Thermos Lunches Kids Will Actually Eat
Related: School Lunch Cost Australia 2026: Real Spend Breakdown
Related: Lunchbox Costs: How Much Should You Really Spend Per Week?
Related: Budget Lunchbox Shopping: Aldi vs Coles vs Woolies
Related: Autumn Lunchbox Food Safety: Australia's Forgotten Danger Zone
Related: Cost Per Lunchbox Breakdown: Real Australian Spending
Related: Bento Box Trend Australia 2026: Why Compartments Beat Brown Bags
Related: Insulated Lunch Bags for Kids: Worth It or Waste of Money?
Related: Warm Lunch Ideas for School Autumn: 15 Thermos Recipes
Related: School-Provided Lunches Coming to Australia: Parent Guide
Related: Best Thermos Food Jars for School Australia 2026
Related: Bento Box Buying Guide for Australian Parents 2026
Related: Bento Box Hacks: 5-Minute Assembly for Perfect Portions
Related: 4-Hour Rule: Lunchbox Food Safety Every Parent Needs
Related: Winter Lunchbox Warmers: 15 Hot Foods That Stay Safe
Related: The $30 Lunchbox Shopping List: 5-Day Plan
Related: Do Lunchbox Ice Packs Work? We Tested 6
Related: Make-Ahead Lunchbox Food That Doesn't Go Soggy
Related: How to Sneak Vegetables Into Every Lunchbox
Related: Easter Lunchbox Ideas Kids Love: 15 Quick & Easy
Related: Kids Won't Eat Lunch Psychology: Why & How to Fix It
Related: School Lunch Cost Analysis Australia: Budget Breakdown
Related: Stainless Steel vs Plastic Lunchboxes: Real Cost Analysis
Related: Bento Box Assembly Line: Pack 5 Lunches in 20 Minutes
Related: School Lunch Prep Sunday: One Hour, Five Days Sorted
I know what you're thinking - "Great, another mess to clean up." But hear me out. After three months of DIY assembly lunchboxes, my 6-year-old is choosing veggie sticks over biscuits, my 9-year-old knows what makes a balanced meal, and I'm spending 20 minutes less each morning on lunch prep.
90%
of Aussie school kids bring home-packed lunches, but 67% contain junk snacks
PMC study 2024
Time to change how we approach lunch packing
Related: Cultural Fusion Lunchboxes: Easy Ideas for Aussie Kids
Why DIY Assembly Lunchboxes Are Game-Changers for Busy Parents
The stats are pretty grim - the average Aussie kid's lunchbox is packed with discretionary snacks, and 51% of parents want to learn more about nutrition but don't know where to start. Assembly lunchboxes solve both problems at once.
Here's what actually happens when kids control their lunch assembly:
- They eat more of what they pack - ownership changes everything
- You save 15-20 minutes every morning - no more decision fatigue
- Kids learn practical nutrition - they see what makes a complete meal
- Less food waste - they pack what they actually want to eat
I've watched my kids go from refusing anything green to voluntarily adding cucumber to their wraps. Not because I forced it, but because they had the power to choose how much and where it went.
Getting Kids Started (Any Age)
Start with choice between two options
Turkey or ham? Crackers or bread? Build confidence with simple decisions.
Add assembly components
Pre-cut ingredients they can combine - cheese cubes, cherry tomatoes, crackers.
Introduce balance rules
Pick one protein, one carb, one fruit, one veggie. Make it visual, not complicated.
Graduate to full independence
Let them plan, prep, and pack with minimal supervision.
Setting Up Your Family Lunch Assembly Station
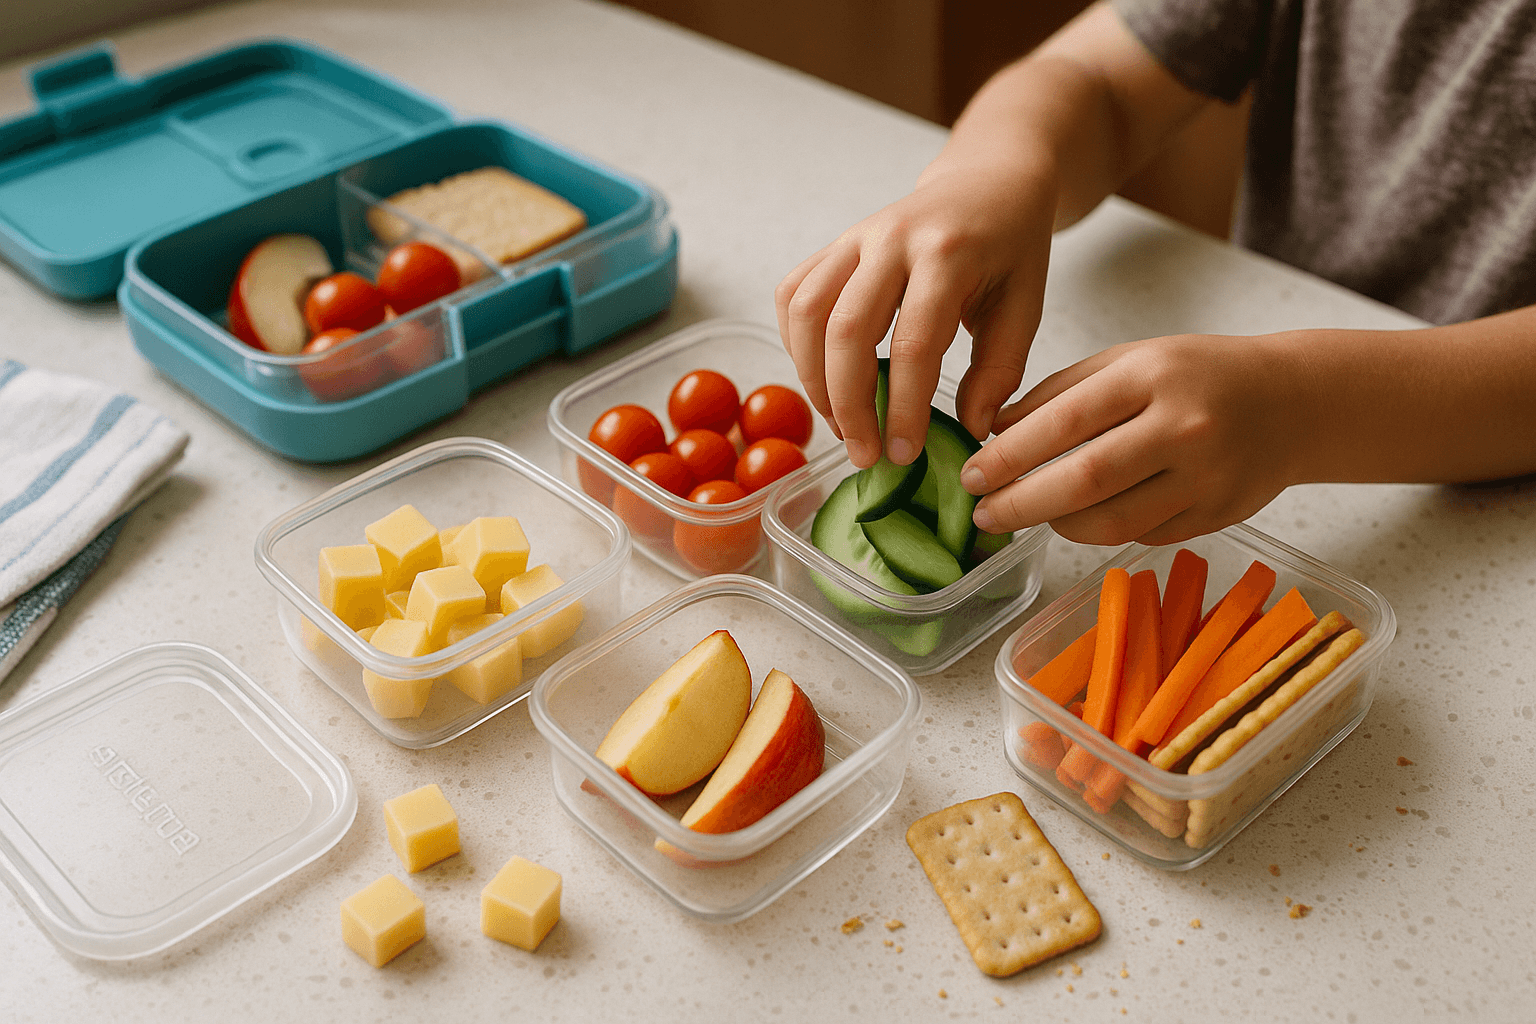
Forget Pinterest-perfect pantries. Your assembly station needs to work for real families with real mess tolerance. Here's my setup that actually survives daily use:
The 60cm Rule: Everything kids need should be within 60cm of each other. I use one section of our kitchen bench, with a Sistema To Go Dressing Pot 4-Pack for wet ingredients like hummus and yoghurt dips.
Storage that works:
- Clear containers at kid height (they need to see options)
- Labels with pictures for non-readers
- Easy-open lids (test them with wet hands)
- Dedicated spots for each food group
Weekend prep layout:
- Proteins: cooked chicken strips, boiled eggs, cheese cubes
- Carbs: crackers, mini muffins, wraps cut in half
- Fruits: washed berries, apple slices in lemon water
- Veggies: cut carrots, cucumber rounds, cherry tomatoes
The key is having everything ready to grab. No washing, no cutting, no thinking required on school mornings.
Dad Hack: The 5-Minute Test
Set a timer and see if your kid can assemble a complete lunch in 5 minutes. If not, your setup needs work. Move things closer, pre-cut more ingredients, or simplify the choices.
Age-Appropriate Assembly Ideas (4-12 Years)
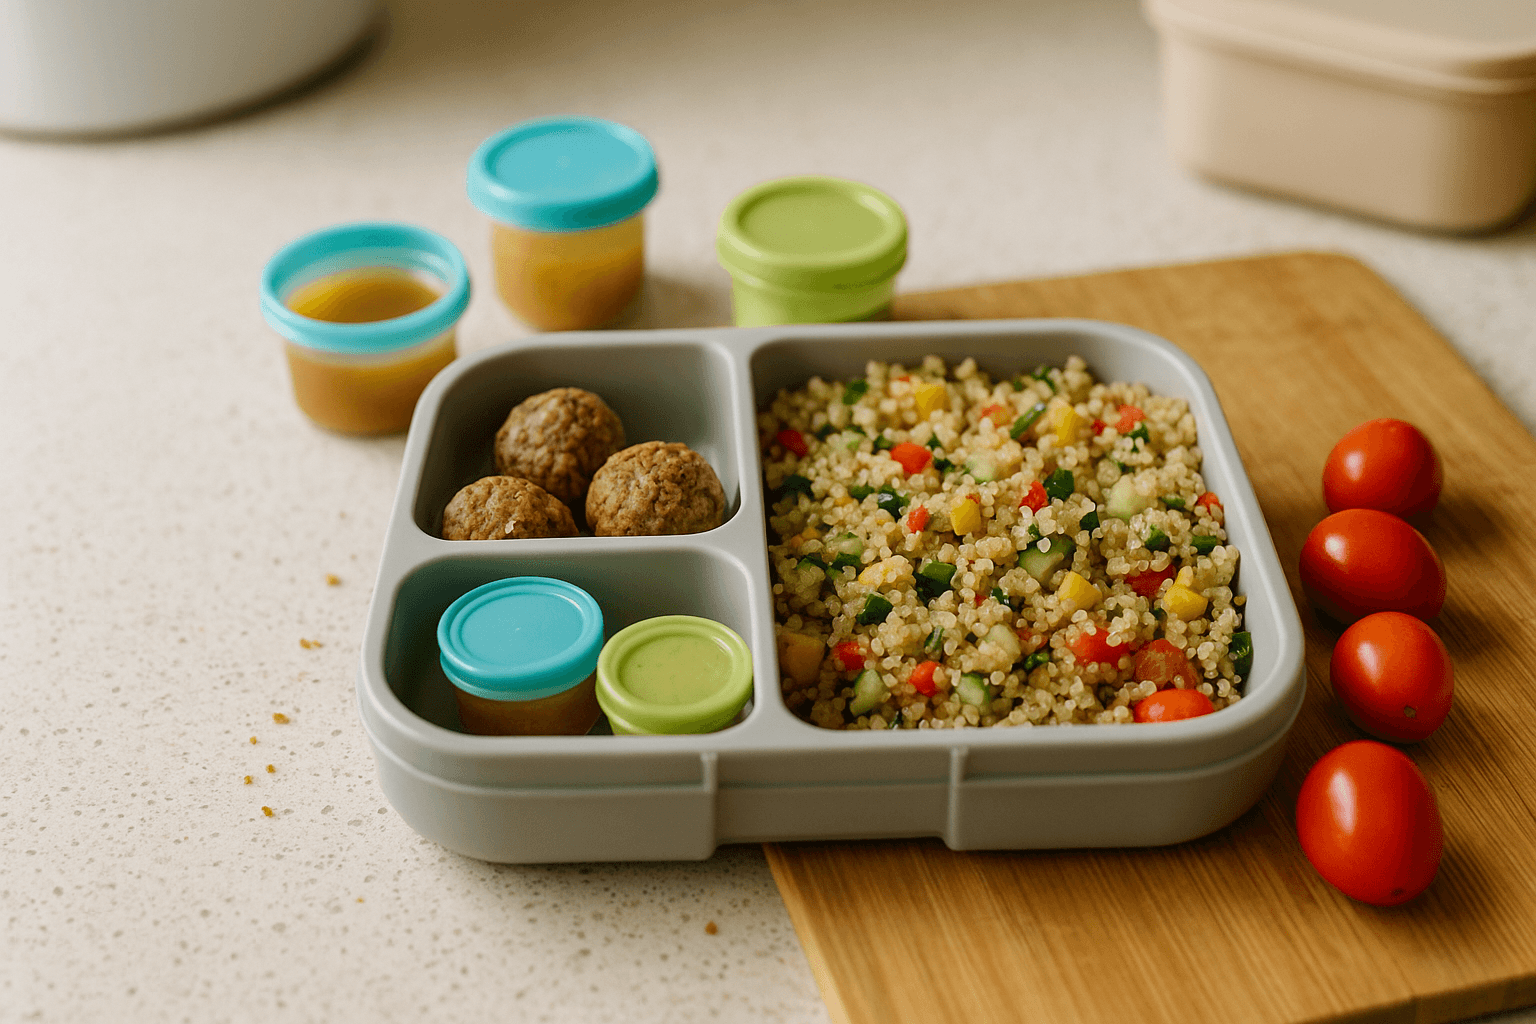
Ages 4-6: Supervised Assembly Think big pieces, minimal mess. My Mini Chicken and Corn Frittata Cups are perfect - they're handheld, protein-packed, and impossible to assemble wrong. Pair with:
- Pre-cut fruit (strawberries, grapes halved)
- Cheese cubes and crackers
- Veggie sticks with small dip containers
Use a Yumbox Original - the compartments guide portion sizes and prevent the "all crackers, no protein" lunch.
Ages 7-9: Independent Assembly They can handle more complex combinations now. Set up stations with:
- Wrap fillings (pre-cooked, pre-cut)
- Bento box components
- Simple recipes they can follow (like assembling pinwheels)
This is when kids start making real choices about balance. Don't micromanage - let them pack three pieces of fruit if they want. They'll learn.
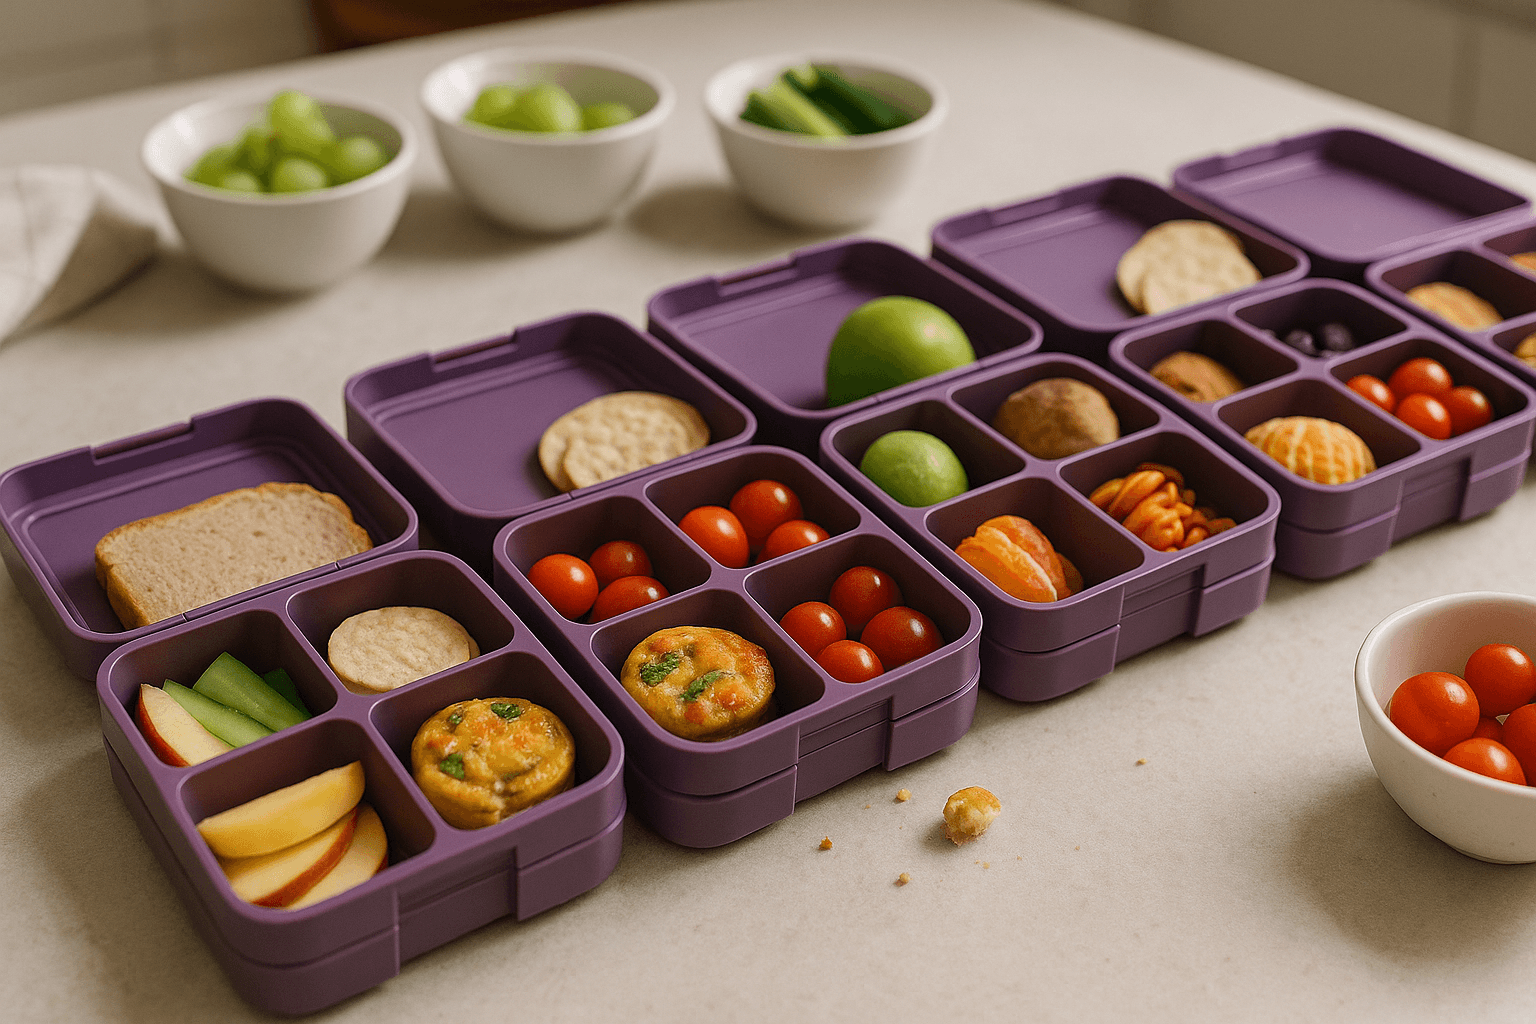
Ages 10-12: Full Planning These kids can meal plan, make shopping lists, and do basic prep work. They might choose to make my Rainbow Veggie Pinwheels on Sunday and pack them all week.
For the best lunchbox containers comparison, older kids prefer multiple smaller containers over compartmentalised boxes - they like the flexibility.
Get Your Sunday Prep Planner
Turn weekend chaos into organised assembly stations with our free printable guide.
Weekend Prep Strategies That Actually Save Time
Here's my one-hour Sunday routine that feeds assembly stations for the entire week:
9:00am - Protein prep (20 minutes)
- Boil 8 eggs
- Cook 500g chicken breast, cube when cool
- Portion cheese into snack containers
9:20am - Fruit and veg (25 minutes)
- Wash and portion berries
- Cut 4 apples, store in lemon water
- Cut carrots, cucumber, capsicum into sticks
- Cherry tomatoes into small containers
9:45am - Carb components (15 minutes)
- Bake a batch of Banana Oat Energy Balls
- Portion crackers into grab bags
- Prep any baked goods for the week
Store everything in clear containers with tight lids. Use Bentgo Reusable Ice Packs (4-pack) - you'll need multiple packs if you're doing this for several kids.
The assembly line lunch packing approach works perfectly with this prep system.
Sunday Prep Checklist
Keeping Assembly Lunches Fresh and Safe
Australian schools can be hot, and food safety isn't negotiable. Here's what actually works:
Temperature control:
- Use a PackIt Freezable Lunch Bag - the entire bag is an ice pack
- Pack cold foods frozen when possible (they thaw by lunch)
- Separate hot and cold items completely
Container strategy:
- Wet ingredients (yoghurt, dips) in small sealed pots
- Dry ingredients (crackers, nuts) in separate compartments
- Fresh fruit in ventilated containers to prevent condensation
The 4-hour rule: Everything needs to stay under 5°C for 4 hours. If your lunch bag can't do that reliably, stick to shelf-stable options.
Preventing soggy disasters:
- Pack wet ingredients separately until eating
- Use paper towel barriers between moist and dry foods
- Choose containers with tight-fitting lids
Building Nutritional Balance Into Assembly Choices
This is where assembly lunchboxes really shine. Instead of lecturing about nutrition, make it visual and simple.
The Quarter Plate Rule:
- 1/4 protein (meat, eggs, cheese, legumes)
- 1/4 carbs (bread, crackers, rice, pasta)
- 1/2 fruits and veggies (aim for different colours)
My kids learned this in about a week. Now they automatically scan their lunchbox: "I need something green."
Choice architecture: Put the healthy options at eye level and in easy reach. Hide the treat foods behind other items. Kids will choose the path of least resistance.
For sneaky veggie tricks, assembly lunches are perfect - kids can add as much or as little as they want, building tolerance gradually.
The balanced lunch framework applies perfectly to assembly-style lunches.
Kids who assemble their own lunches eat 40% more vegetables and waste 60% less food than kids with pre-packed lunches. The power of choice is real.
Troubleshooting Common Assembly Lunchbox Problems
Problem: Kid packs all crackers, no protein Solution: Start with "pick one from each station" rules. Make it a game, not a battle.
Problem: Assembly station becomes a disaster zone Solution: Smaller containers, designated spots for everything, and a "clean as you go" rule.
Problem: Takes longer than making lunch yourself Solution: You're in the learning phase. Stick with it for 2 weeks - speed comes with practice.
Problem: Kid won't eat vegetables Solution: Start tiny. One cherry tomato. One cucumber slice. Build success, not stress. Check out these strategies for fussy eaters for more specific tactics.
Problem: Dietary restrictions make assembly complicated Solution: A Sistema Bento Lunch Box with clear compartment separation works well for allergies. Label everything clearly and involve kids in identifying safe options.
DIY Assembly Lunchboxes
Pros
Kids eat more of what they pack
Saves 15-20 minutes on school mornings
Teaches practical nutrition skills
Reduces food waste significantly
Builds cooking confidence early
Cons
Initial setup takes weekend time
More containers to wash
Kitchen mess during learning phase
Requires consistent weekend prep
Not suitable for very young kids (under 4)
The mess is temporary. The independence is permanent. And honestly, watching your 7-year-old confidently pack a balanced lunch while explaining why they need protein is worth every extra container you'll wash.
Start with DIY bento assembly kits if you want a more structured approach, but don't overthink it. Give kids choices, set basic balance rules, and let them learn by doing.
Your morning routine will thank you, and your kids will develop food skills that last a lifetime.
How useful was this?
Get Your Sunday Prep Planner
Turn weekend chaos into organised assembly stations with our free printable guide.
Written by Pat
Dad of two, Melbourne. Half Chinese, raised on incredible food. I make quick school lunches and test every piece of gear before recommending it. No bento art — just real food made with love.